Hello! Here is a quick tutorial on how to make an asian-style baby carrier. This kind of baby carrier comes from Asia, and is the traditionnal baby carrier in many asian communities. It is becoming very popular in the western world for it's versatility (front carry, back carry, possibility to breastfeed while wearing the baby, etc) and because it is very easy to use. It also allows for a correct and physiological posture for the baby, and is very comfortable for the wearer. The only downside is that the straps are very long, and tend to get dirty easily especially if you are trying to put it on outside. It is also very easy and cheap to make.

What you will need:
-A sturdy fabric for support, either twill, canevas, or any kind of sturdy fabric that could withstand the weight of a 30-40lb child. You will use this for the inside of the body, and for the straps and belt. I used an old sturdy tablecloth I didn't need anymore. You will need about 2.20 meters, (or a little more if the fabric is not very wide).
- A decorative fabric for the outside. You can use any kind of fabric, cotton, designer prints, linen, silk (though I wouldn't recommend silk as it stains easily and is not simple to wash), whatever you like. this is just for the look. I chose a cute African print cotton I found in Montreal. You will need about 50cm of this, a little more if the fabric is less than 75cm wide.
- A lining fabric for the outside. This is for the baby's side, so I suggest you chose something soft. I used cotton flannel, but you could also use minky, baby corduroy, or soft jersey. You could also choose another fun print to make the carrier reversible. You will need about 50 cm of fabric.
- Something to pad the belt. I used an old bath towel, but I would reccommend polar fleece or some kind of foam made for that purpose. Ask the lady at the fabric store.
-Some heavy duty thread of the right color.
Pattern and cutting:
You can click on the images below to see the pattern pieces and the measures indicated in centimeters on them. Don't forget that these pieces are cut on the fold (the fold is on the left)
Cut the main piece once in your sturdy fabric, once in the decorative fabric, and once in the lining fabric.
For the headrest, you could also cut a rectangle measuring 25 x 20 cm if you don't want to complicate things. The curvy design is just fancy, there isn't a real reason for making it that way. You can cut it simply twice in the decorative fabric, or you can add (like I did) one layer of the sturdy fabric for extra support. But it isn't really that necessary. You could also choose to cut it once in the lining and once in the print. You choose!
The belt and straps: cut three pieces measuring 2,10m x 22cm. I'm quite petite, so mine are 2,05m x 22 cm. If you are making it for a man or a larger person, I suggest you make the straps at least 2,10m long.
The padding for the belt: My piece of bath towel is 48cm x 16 cm. If you are using foam (choose it thick enough, at least 2-2,5 cm thick) cut a piece measuring 48cm x 8 cm. If you chose polar fleece, cut a piece measuring 48cm x 32 cm.
The headrest ties pieces are about 4cm wide and 25 cm long.
The little pieces to tie the headrest ties to are about 4cmx6cm.
Note: my seams are about 1/2 inches wide (1.25cm), except for the really small pieces, like the headrest ties, where the seams are narrower.
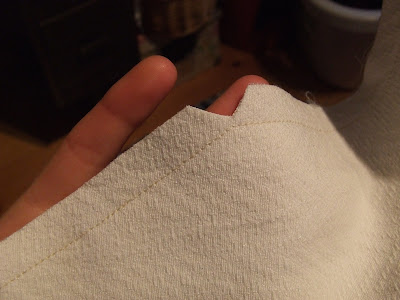
Start by ironing all the straps, and cut an angle like the following on on end of each straps, and on both ends of the belt.


Cut a v at the angles, turn the straps and the belt around, and iron them.


Next, prepare the headrest ties. sew them right sides together, leave a gap at one end, turn them over, iron and topstitch. they should look like this:

Then, place the ties between the two layers of fabric making the headrest, right sides together, like in the picture. If you chose ti reinforce it wth some of the sturdy fabric, put it underneath it all, like in the picture. Make sure the ties are at the right angle (straight). They were not at the right angle in the next picture, I had to readjust them afterwards.

Sew all around the headrest, except over the bottom.


In an upcoming blog post, I will show a step by step guide on how to put on the Mei Tai, in the two ways illustrated here.
Here are some other nice Mei Tai tutoruals I found online:
http://scanditute.blogspot.ca/2008/08/make-scandi_18.html
http://www.grumblesandgrunts.com/2010/10/how-to-sew-mei-tai-baby-carrier.html
http://meloncollie.over-blog.com/article-tuto-du-mei-tai-52408281.html
http://www.hobomama.com/2012/03/how-to-sew-mei-tai-baby-carrier.html
Have a nice day, and happy sewing!

What you will need:
-A sturdy fabric for support, either twill, canevas, or any kind of sturdy fabric that could withstand the weight of a 30-40lb child. You will use this for the inside of the body, and for the straps and belt. I used an old sturdy tablecloth I didn't need anymore. You will need about 2.20 meters, (or a little more if the fabric is not very wide).
- A decorative fabric for the outside. You can use any kind of fabric, cotton, designer prints, linen, silk (though I wouldn't recommend silk as it stains easily and is not simple to wash), whatever you like. this is just for the look. I chose a cute African print cotton I found in Montreal. You will need about 50cm of this, a little more if the fabric is less than 75cm wide.
- A lining fabric for the outside. This is for the baby's side, so I suggest you chose something soft. I used cotton flannel, but you could also use minky, baby corduroy, or soft jersey. You could also choose another fun print to make the carrier reversible. You will need about 50 cm of fabric.
- Something to pad the belt. I used an old bath towel, but I would reccommend polar fleece or some kind of foam made for that purpose. Ask the lady at the fabric store.
-Some heavy duty thread of the right color.
Pattern and cutting:
You can click on the images below to see the pattern pieces and the measures indicated in centimeters on them. Don't forget that these pieces are cut on the fold (the fold is on the left)
Cut the main piece once in your sturdy fabric, once in the decorative fabric, and once in the lining fabric.
For the headrest, you could also cut a rectangle measuring 25 x 20 cm if you don't want to complicate things. The curvy design is just fancy, there isn't a real reason for making it that way. You can cut it simply twice in the decorative fabric, or you can add (like I did) one layer of the sturdy fabric for extra support. But it isn't really that necessary. You could also choose to cut it once in the lining and once in the print. You choose!
 |
| headrest |
 |
| ''body'' part |
The padding for the belt: My piece of bath towel is 48cm x 16 cm. If you are using foam (choose it thick enough, at least 2-2,5 cm thick) cut a piece measuring 48cm x 8 cm. If you chose polar fleece, cut a piece measuring 48cm x 32 cm.
The headrest ties pieces are about 4cm wide and 25 cm long.
The little pieces to tie the headrest ties to are about 4cmx6cm.
Note: my seams are about 1/2 inches wide (1.25cm), except for the really small pieces, like the headrest ties, where the seams are narrower.
 |
| All the pieces laid out |
 |
| The main body pieces, plus the towel bit |

Fold the straps right sides together, and make a seam, leaving the un-angled side open.

Do the same for the belt, except the part to leave open is right in the middle. Leave a gap slightly longer than the padding piece.

Cut a v at the angles, turn the straps and the belt around, and iron them.
Leave the belt piece on hold, and topstitch all around the two straps.


Next, pin the straps on the canvas/sturdy fabric body piece. Place them on the angles at the top, and sew a box with an X to keep them securely together. I went over the seam a few time to be sure it will hold. It should look like this:


Turn it around, iron it and topstitch. It should look like this:

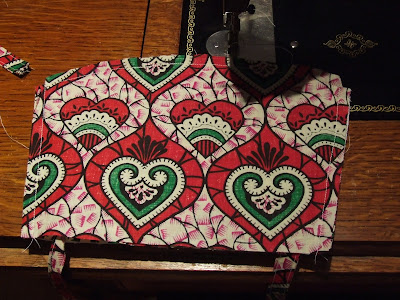
Next, lay down the body, and roll and tie the straps so they will not be in the way. On top of it, place the printed fabric facing up, then the headrest on top, and finally the lining, right sides together with the printed fabric. Like this:

Now, pin and sew all around the piece obtained, except over the straps and leave the bottom open.

Trim the seam allowances like this:

Afterwards, turn the piece over and iron it. Then tuck the unsewn edges tht are at the straps under and pin them in place.

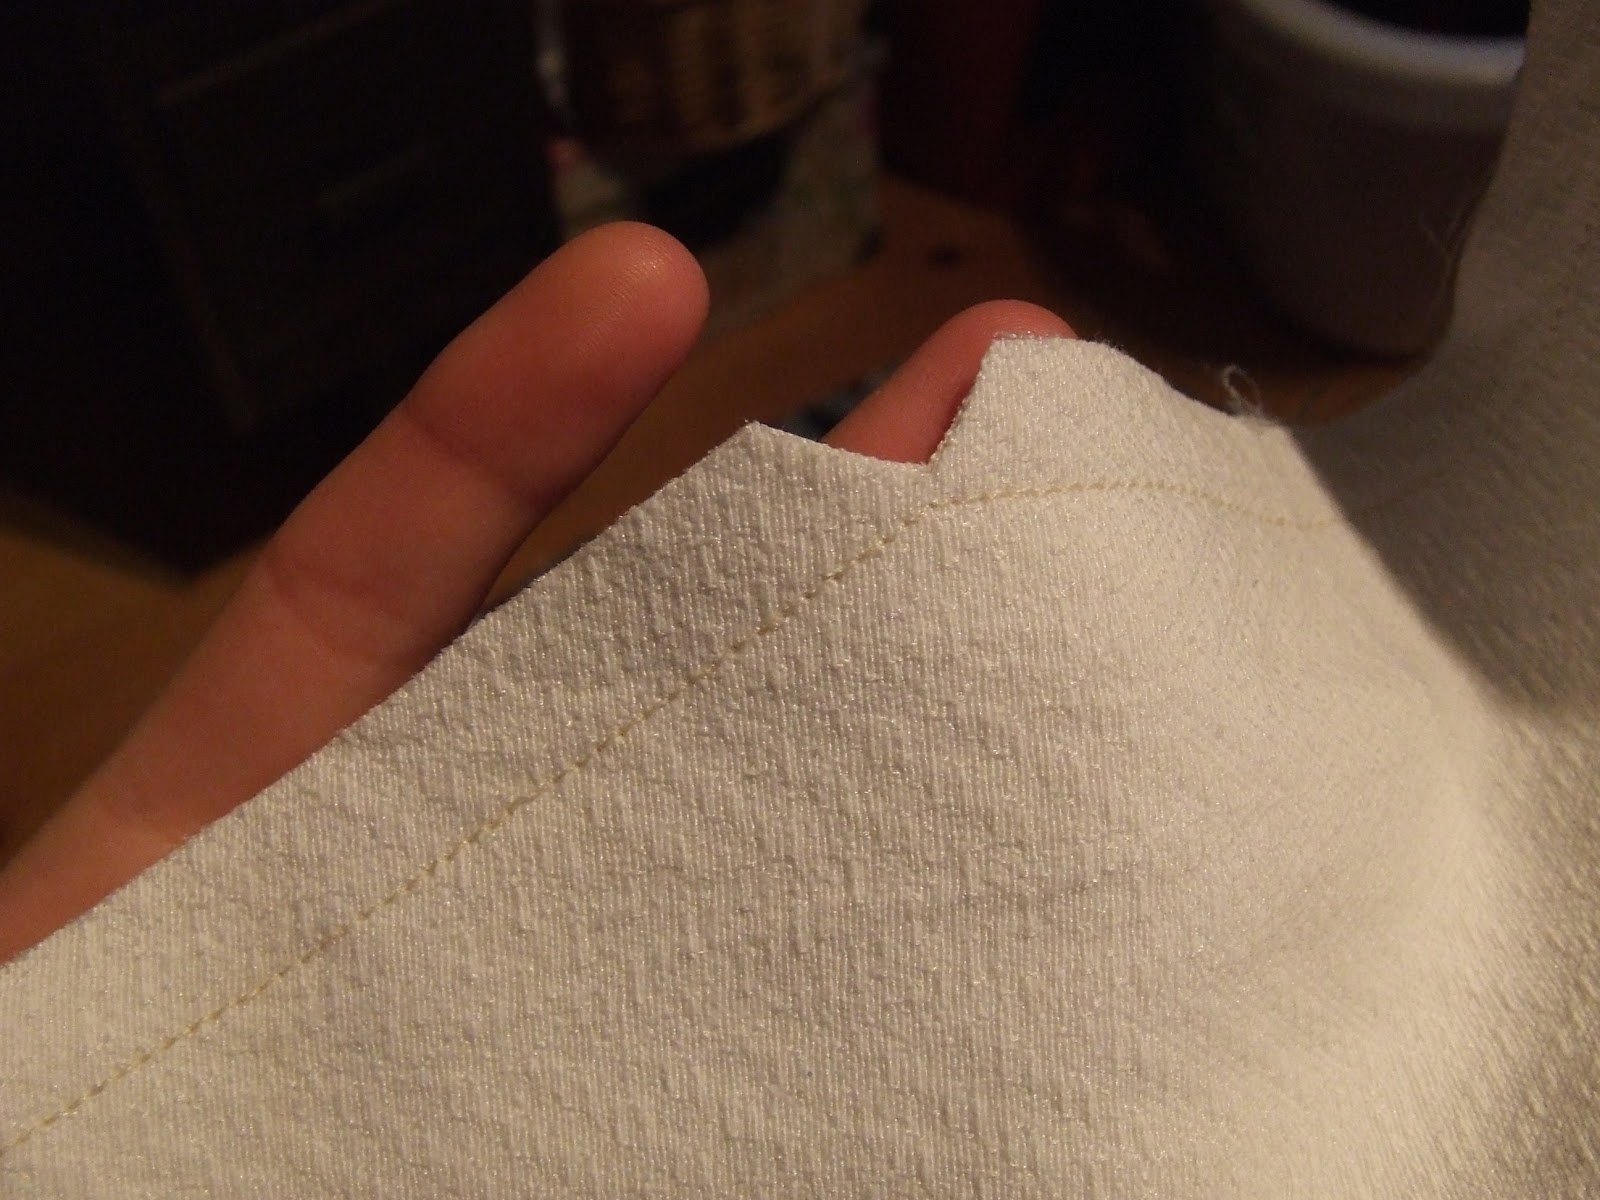
Topstitch all around the body piece.

Close-up on the seam:

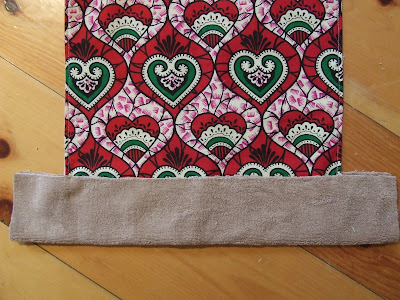
Next, take the padding you chose for the belt. If you chose the towel, fold it in half lengtwise, and slide the bottom of the body piece all the way down the fold. If you chose the fleece, fold it in two lengtwise, and then fold the edges (lengtwise) all the way back in towards the fold. Slide the body of the carrier all the way down the fold, and tri to center it all. If you chose the foam, just lay it over the bottom of the body piece.

You can pin or baste the padding in place. Now, remember the belt we left waiting? take it back, and slide the padding inside the gap you left open at the middle. Make sure the belt straps are even on both sides, and pin it in place. Stitch it in place, and topstitch all around the belt as you go. Then make a few horizontal seams over the padding to keep it in place. I made two seams, but you can do more. I know my seams aren't straight, I had a few problems with my machine, got a little frustrated at the end, and didn't pay enough attention to the straightness of my seams... oh well. It'll do.


The very last part is to fix the little tie hooks on the straps. Prepare the two tiny little strips of fabric like you did the headrest ties, and fix them either horizontally or vertically by making a little seam on each of the edges, in the middle of the strap about 18 cm above the place where the strap meets the body.

Ta Daa!! It's done! A pretty new Mei Tai ready to use! It really doesn't take that long to make. I hope my instructions are easy enough to understand. I did forget to take enough pictures for the more complicated bits. Please note that I am not responsible if a baby carrier made from this tutorial has defects, or if any injury is caused by it. It is your responsibility to choose the appropriate fabrics (like the ones I suggestd), to care for it properly, use it correctly, and check it often for any sign of wear.


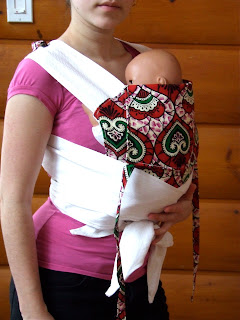
And here is how it looks like on someone (me, actually), and with a plastic doll in it. It is also possible to do a back carry when it is a little older.
The next two pictures show an infant carry. When the baby is very small, it is better not to force it's little legs out of the carrier. It is important to respect the baby's developpement and natural posture.


Here are some other nice Mei Tai tutoruals I found online:
http://scanditute.blogspot.ca/2008/08/make-scandi_18.html
http://www.grumblesandgrunts.com/2010/10/how-to-sew-mei-tai-baby-carrier.html
http://meloncollie.over-blog.com/article-tuto-du-mei-tai-52408281.html
http://www.hobomama.com/2012/03/how-to-sew-mei-tai-baby-carrier.html
Hi.. thanks for this tutorial.. i love it and will do mei tai for my bubba..
ReplyDeleteYou're welcome, enjoy!
Delete